Bareboat Yacht Charter - Whitsunday Islands, Australia, in a Perry 43 Catamaran

This is a journal about a family Bareboat Yacht Charter adventure in the Whitsunday Islands, Australia, on board, 'Cat Nap', a large Perry 43 catamaran. We rented the vessel from Whitsunday Rent a Yacht, Shute Harbour, but there are several other companies operating out on Airlie Beach and Hamilton Island.
Our flights landed in Proserpine, but you can also get flights to Hamilton Island which lies in the centre of the Charter area, which extends from Hayman Island in the North to Lindeman and Shaw Islands in the South.
The charter area is about 25 nautical miles long from North to South and 15 nautical miles wide, East to West. The dominant winds are the SE trade winds during the peak season in the September to October and the 'Shoulder Period' from June to August. A yacht or motor vessel travelling at 7-8 knots can travel the entire charter area North-South in 4 hours and East-West in 2 1/2 hours. Even beating upwind under sail the entire area can be traversed North to South and East to West in a single 6-8 hour day.
The Whitsundays is a truly magnificent set of continental islands, lying just off the coast of tropical Queensland surrounded by coral reefs and clear turquoise waters teeming with fish, turtles, whales and bird life. You can also go walking and camp on the islands and visit the many resorts in the area such as Hamilton Island, Hayman Island, Daydream, several other smaller ones and Airlie Beach, the backpacker capital of Queensland.
The Whitsundays Yacht Charter Area


The Charter Boundaries
The Charter area extends from Hayman Island in the North, to Shaw Island and Thomas Island in the south. It also extends from the mainland to the offshore areas east of Border Island and Hazelwood Island on the Eastern boundary. The offshore outer reef areas, such as Bait Reef, are out of bounds for charter vessels.
The recommended anchorages are also shown in the image above.
The Publication - "100 Magic Miles of the Great Barrier Reef - The Whitsunday Islands" by David Colfelt provides fabulous and very comprehensive information and maps showing the best anchorages and the Public Buoys. It is the 'Whitsundays Bible' with lots of valuable background information and advice.
Related Articles
Touring Paris, France - Crowded but Nice Away from Tourist Trails
Paris, France - Beating the Crowds, Tour Groups and Selfish Selfies
Dresden, Germany - Parks, Art, Museums, Open Space, Public Transport
Hamburg, Germany - Snapshot and Highlights of a Three Day Visit
Nuremburg, Germany - Castles, Churches, Museums, Market Stalls
Berlin, Germany - Big, Bold, Brash and Monumental
Copenhagen, Denmark - Nice City, Good Tourist Buses, Friendly Community
Barcelona, Spain - What a Pleasant Surprise
Visiting Amsterdam, Netherlands - Canals, Bikes and Fabulous Museums


Perry 43 Catamaran
We opted for the Perry 43, a very large and comfortable catamaran. We needed 4 separate sleeping areas. 'Cat Nap' has 4 cabins, 3 of which have their own heads and shower facilities (via a shower head connected to the sink). The two large foreward double cabins have floor drainage for showers.
The kitchen is huge with a large freezer and half size fridge, There is a gas oven/grill and a large 3 burner stove that can accommodate large pots. There is a microwave, but it can only be used when the vessel is in port and connected to mains power, or using the inverter when the motors are running and generating power. There is plenty of cupboard space for provisions and there is a full complement of cooking utensils.
The cockpit / back deck area is very spacious. The table has huge ice-chest in the centre for food and drinks. The 4 blocks of ice we added lasted a week. The table folds out to seat 8 people comfortably on the back deck, which has a large gas BBQ. There is lots of storage under the seats for snorkelling gear, stinger suits and other equipment.
There are two large water tanks. We only used about half of the water for each of the two weeks. We only used one of the two gas bottles over the 14 day charter. There is hot water available which is heated by the motors. There is a wash off shower head on a hose line on the starboard 'sugar scoop' above the ladder that folds out. It is a breeze getting off and onto the cat from the water.
Sail Controls
The steering area is shown in the images. All the sail controls lead back to winches at the front of aft deck area. The No. 1 reef control is on right side. The mainsheet halyard, No. 2 reef and mainsheet controls are on the port side, near the steering wheel. The foresail winches are located on either side at the front of the deck area.
The yacht can be easily sailed by two people. The lazy jack makes it easy to keep the main under control when lowered, but it is fiddly raising and lowering the mainsail to avoid getting the battens tangled in the lazy jack lines. The reefing lines also need to be pulled in as the sail is lowered when the main is raised to the top of the mast. This job was easier when the cat was motored forward at low speed into the wind.
Motors and Cruising Under Power
The Perry 43 has twin diesel motors, one in each hull. The separate controls for the two motors helps to make the yacht steerable at low speed. Reversing one motor, while having the motor going forward, means that the yacht can be spun around like a top. The motors can be used to steer the yacht at low speeds. The rudders do not work for speeds below 3 knots. This makes it relatively easy to control such a large vessel at low speed. The cruising speed of the Perry 43 at 3/4 throttle was around 8-9 knots in calm waters, and 7 knots heading upwind into a swell.
The yacht handles a 1-2 m swell very well when heading downwind, reaching or beating the windward. Motoring directly upwind into a 1.5 m swell tended to produce a minor 'hobby horsing' motion and minor bashing into the waves, which can be uncomfortable. It is better to motor at an angle to the swell, or wait for the swell to drop before heading upwind in large swells. We did not attempt motoring upwind directly into a 2 m swell - which could have been 'interesting'.
Charging the Batteries
The motors had to be run under power or in neutral at 1500 RPM for a minimum of 3 hours per day to keep the batteries charged. This was annoying for us, as we primarily wanted to sail whenever we could. However, the fridge, freezer, head and other pumps need a lot of power and so this is the price of luxury! Otherwise its freeze-dried stuff and ship's biscuits I guess! Wind and solar arrays would have helped, but the cat requires a lot of power. There are separate batteries for the motors which is nice to know. The lowest voltage overnight was 12.2 volts, at which the fridge and freezer still operated.
Sailing Performance of the Perry 43
Given that most people only travel for 3 hours a day, most charter groups probably don't use the sails very often. But we persevered and sailed with the engines running in neutral. Once the 3 hours were up the motors could be switched off. We found that the effective sailing window for winds was 10-20 knots. A large swell causes the mainsail to flap about in winds of about 10 knots on a broad reach. Our longest sail was a tight beat upwind from Cid Harbour to Lindeman Island in 5 hours, averaging about 6 knots, in 15 knot wind with a 1 m swell. This was a very comfortable and enjoyable passage, despite having to head upwind into the swell.
The Perry 43 sailed very well and was quite fast under sail. You can motor sail leaving the mainsail up when negotiating tight passages. Then simply resume sailing when you are through. This meansthat you don't have to lower the main.
Monohull versus Catarmaran - Which is Better?
For sailing purists the monohull is the best choice. However, for the Whitsundays a large catamaran offers the following advantages.
► The cat is faster in winds from 10-20 knots.
► The cat rocks less on a mooring or when at anchor. You could easily pick out the monohulls when viewing a group of yachts at anchor in the distance. Their masts showed a pronounced pendulum action, whereas the cats were much more stable
► The huge cabin and back deck areas are a winner in terms of crew and passenger comfort.
► The shallow draft and 'sugar-scoop' aft shape of the cat were real advantage in terms of getting closer to the reef areas and feeling more secure when anchored. There are relatively large 3m tides in the area and this is another consideration. The ideal depth for anchoring was 5-9 m at virtually any tide - this is a great rule of thumb if you deploy most if the chain. We generally let out 40-50m of chain to prevent any slippage of the anchor. We always checked for slippage by taking bearings and checking regularly. We only had one instance of a slow slippage on anchor in Cid Harbour. We re-anchored at another location in Cid Harbour without any further problems.
Provisioning
We chose to use Whitsunday Provisioning (Gold Option). This was a great option. They thought of everything - with lots of dairy, meat and a great range of foods all in clearly labelled boxes. This made the loading into the fridge, freezer, cupboards and ice box a much easier task. There was lots of variety. The food was delivered to the dock area and the first batch for the first week was there when we arrived for our 'sleep on board' for the night before the start of the charter. The second batch was delivered for the second week of the charter. There was more than enough food. We brought our own museli, fresh ground coffee and an 'Italian' style stove top coffee maker. There was lots of fruits and vegetables. We passed on the drinks option!!!
Daily Radio Reports, Travelling and Anchor Times
Under the terms of the charter we had to be on a mooring or anchored by 1530 hours each day and could not leave until 0800 hours the next morning. There were regular radio communication sessions in the morning and afternoon. At the morning session (0745) we were given weather reports and tide information. We were also required to outline our plans for the day and out intended anchoring or mooring location for the following evening. Occasionally some groups had to revise their plans due to strong winds and high swell conditions. At the afternoon session we were required to say where we were anchored for the night. The WRAY staff were always very helpful and surprisingly calm and patient when faced with all sorts of issues and problems. They made the booking at Hamilton Island for us. Radio reception was excellent apart from areas at Stonehaven and further north in high winds. Fortunately, there is internet and mobile reception at Stonehaven and we made contact via mobile phone on one occasion.
Public Mooring Buoys Preferred to Anchoring
Picking up a public mooring was better than anchoring as it was simpler to hook up and much more secure. The buoys were also very close to fabulous locations such as beaches and reefs. There was a lot of competition for the mooring buoys. We generally looked for vacant moorings around 1400 hours. This meant that the 2 hour limit for use of the mooring would extend to 1600 hours and meant that we could then stay on the mooring overnight.
The moorings are located in areas of great diving and close to beaches with very short lines, so you are as close as you can be. We used the afternoon to explore these attractions, diving off the yacht for snorkelling sessions. We also launched the dinghy and explored nearby beaches and walking trails. Low tide sometimes restricted access to the beaches. The other option was to suit-up for snorkelling and to take the dinghy to the beach or other locations.
Charter Journal
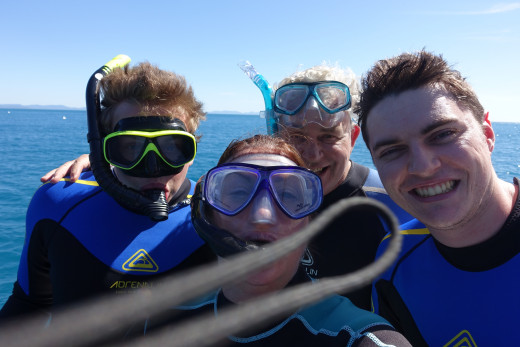
The Crew


DAY 1 - Nara Inlet
We chose to stay on board 'Cat Nap' on a mooring in Shute Harbour the night before the start of the charter. This was a great idea as we had more time to get organised and become familiar with the yacht. Our provisions were there when we arrived, and we had extra time to load the supplies into storage. We cooked using the provisions that night.
The Briefing
The charter started with a very comprehensive briefing in the dock about all the features of the vessel. There was a lot to learn. But there is a comprehensive manual that provides all the details. After about 2 hours we were ready to go. Our previous experience more than satisfied the need to ensure we would handle the cat ourselves. A staff member drove the vessel out of the harbour before the on water hand over.
The electronic GPS Chart and passage plotter was checked and reset for our needs. This unit was essential for helping us navigate and know our location. Cloud, mist and rain can reduce visibility. The unit also showed bearings and passage lines through some of the more hazardous areas. Using the GPS unit, combined with the '100 miles' bible, and depth sounder, we always had enough information to navigate and avoid potential hazards. The paper navigation chart was used as a back up.
We then raised the sails under the guidance of the instructor and sailed for a short distance, trying a tack and a gybe. We then lowered the sails.
The staff member then disembarked into an inflatable and we were ready to go.
First Anchorage - Nara Inlet
Our first destination was Nara Inlet, located on the southern side of Hook Island. This was only about an hour away by motor and it is a very safe and sheltered harbour in virtually all wind conditions. The safe passage area, through the narrow entrance between reefs, is clearly marked with buoys. Nara is a long and deep 'Ford' like inlet with steep hills along each side. We anchored successfully with a group of other yachts towards the end of the inlet. We spent time settling in, and launched the inflatable dinghy to get familiar with its use and the system used to winch it up at the back of the yacht. Tried some fishing, but without any luck. The first night was calm and restful with a gentle rock helping us sleep. The BBQ worked very well.


DAY 2 - Stonehaven Anchorage
On the second day we motored from Nara Inlet to Stonehaven area. We explored Langford Island and Reef, mooring at a buoy, diving and going ashore in the dinghy. We also dived at Black Island. Then, we explored Hayman Island from the water, including checking out Blue Pearl Bay on the Western side, with its fabulous diving buoys and lovely beach (accessible at all tides).
Late in the afternoon we then found a buoy in Stonehaven near Anchor point, dived on the local reefs and went ashore on the beaches in the area. There are many buoys in this very sheltered area, but it is very popular and hard to find a vacant buoy at the end of the day for staying overnight.
Stonehaven has internet access - a real bonus! Incidentally, Internet access is also available along the length of Whitsunday Passage within line of sight of Shute Harbour, Hamilton Island, Airlie Beach and Hayman Island. There is reasonable coverage in Cid Harbour, but not in Nara and in the water outside.
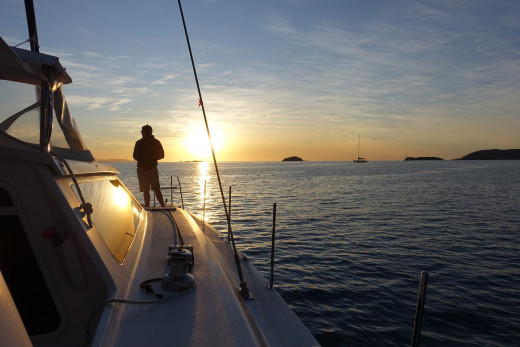
Stonehaven is renowned for its sunsets!!!!


DAY 3 - Butterfly Bay and North Hook Island Dive Spots
We left our mooring in Stonehaven and motored between Landford and Hayman Islands. Then we raised the sails and headed north around Hayman Island past Blue Pearl Bay. Then we sailed to Butterfly Bay. We tried to find a buoy in one of the premier dive spots in the North Hook bays. Luckily we found one vacant in Butterfly Bay on the second try. We secured to the buoy and then dived on the local reefs and explored the beaches using the dinghy. This is a safe anchorge in a South / South-East Wind away from the swell.


DAY 4 - Tongue Bay and Whitehaven Beach
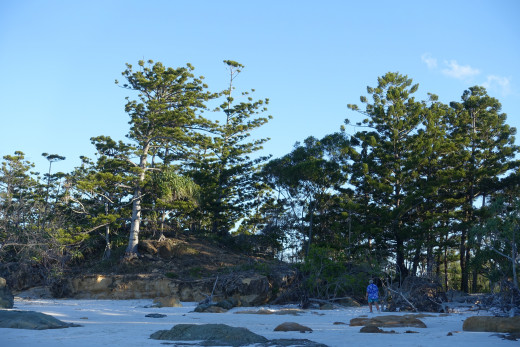
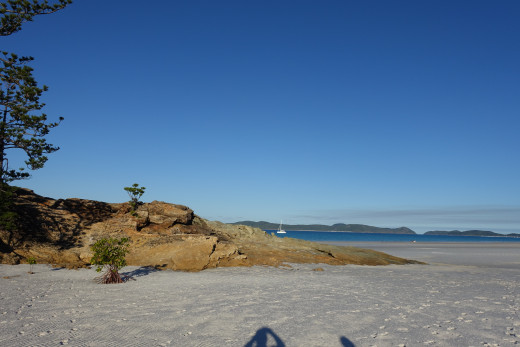
We left Butterfly Bay and had a dive at Refuge Bay on the northern end of Hook Island. Then, we sailed south to Tongue Bay. There was a buoy available there and so we grabbed it for the night. We launched the dinghy and headed back around the headland and landed on the extreme northern end of Whitehaven Beach at Betty Beach (see map). In some ways this is the best way to experience the white sands of this renowned beach away from the crowds that cluster around the southern end near Solway Passage. We enjoyed walking amongst the rocks and vegetation around the headland as well as the expansive dunes of white sand behind the beach. Tongue Bay is less exposed than anchoring at Whitehaven for an overnight stay. Tongue Bay also has some worthwhile diving spots. You can also walk to the lookout.
A week after we left the northern area of Whitehaven Beach was closed for filming the latest in the series of Pirates of the Caribbean movies. Windy bay was also closed. Barges could be seen transporting coconut trees to the beach. There was heavy machinery on the beach ready to transplant the coconut trees and transform the area into a movie set.
Departing from Butterfly Bay to Tongue Bay


Tongue Bay and the Northern end of Whitehaven Beach


DAY 5 - Whitehaven Beach and Overnight Stay at Hamilton Island
We left Tongue Bay and anchored near the southern end of Whitehaven beach. We used the dinghy to get to the pure white sands of Whitehaven Beach and enjoyed a long walk north. It was quite crowded with hordes of ferry passengers resembling soldier crabs. We than made a safe passage through Solway at high tide, and then proceeded to our arranged berth in the Hamilton Island marina.
We found that the main resort at Hamilton Island was showing its age, as it appears nothing much has changed for 20 years when I last made a visit (still no hot showers at the pool). The 'village' atmosphere on the northern side of the marina area was much more welcoming. There is a pub, a bakery, grocery store, ice cream and fish and chips shops. We had a lovely meal at an Italian restaurant and topped up our supplies at the store. We enjoyed a peaceful night in the marina which has fabulous showers. We topped up our water tanks, recharged the batteries and generally relaxed.


DAY 6 - Return to Shute Harbour for topping up fuel, water, food for the send week
We chose to stay overnight at the Shute Harbour base for resupply and top up provisioning. We topped up our fuel, water and loaded the second week provisions. We also spent an evening together in Airlie Beach enjoying a lovely seafood meal. This was the last day for Jesse who could only join us for the first week. Airlie beach was very similar to how it looked 20 years ago. Nice pool, beach and marina. Lots of back-packers enjoying the town.
DAYS 7, 8 and 9 - North Hook Island, Hayman Island Adventures, based in Stonehaven due to high winds and swell
When we left Shute Harbour to start the second week of our charter the winds were blowing 25-30 knots from the south and there was a 1.5 m swell running. We decided to motor downwind and seek shelter in Stonehaven. We motored in relatively sheltered waters past Daydream Island and South Mole Islands, before making the passage through 'Unsafe Passage' (safe enough but narrow - use the lights and recomnmended bearing). Then we ventured out into the high winds and large breaking swell in Whitsunday Passage heading downwind, north for Stonehaven.
Motoring downwind at a slight angle to the swell was reasonably comfortable with not much excitement. 'Cat Nap' handled the downwind passage in 25 knot winds and 1.5 m swell very well, with only a few instances when waves splashed over the side, bows and into the cockpit area. If we had headed to Nara Inlet across the swell we would have rolled about and the passage would have been much less comfortable. There may have been a mutiny if we were stuck in Nara for three days. Cid Harbour would have been OK as well.
The high winds and swell stayed up for the next three days. So we were based in Stonehaven and used the time to explore Blue Pearl Bay on the western side of Hayman Island, Langford Island and Black Island and the series of small bays along the northern side of Hook Island. We returned to the buoys in Stonehaven each night. The extreme weather meant that there were few other yachts about. So we could get easy access to the public buoys in the area.
Blue Pearl Bay
This is a delightful location with some fabulous reefs and a lovely beach. We spent half a day enjoying its delights. There were few other yachts and so we had the area virtually to ourselves. There was too much swell to stay on a buoy over night there, and so we returned to Stonehaven. The diving off Langford Island, from the last buoy West, was delightful.
Strangely, we found that there are few yacht about on the weekend, probably because it is change-over time. But there are many dive boats hogging the buoys. Later in the year, around September and October there may be more yachts about with more competition for the buoys.


DAY 10 - Sailed south down the Whitsunday Passage to Cid Harbour
Finally the winds had dropped to 15-20 knots. We had rocks on our heads from our long stay at Stonehaven. We had a great sail in the open waters of the Whitsunday Passage and anchored in Cid Harbour near Sawmill Beach. This was the first stage of our plan to sail the full length of the charter area from Hook Island in the north to Lindeman and Shaw Island in the south.
There were 39 other yachts anchored there, probably due to the high winds. Cid Harbour is a very large anchorage site. We used 50 m of chain, as we had slipped on the anchor on a previous visit. We were told that up to 100 yachts can anchor there during the peak spring season in August and September.
We enjoyed going ashore in the dinghy to Saw Mill Beach. We enjoyed walking through the forest on the track over the headland to Dugong Beach.
The Perry 43 sailed very well and reached 6-7 knots upwind in a 15 knot breeze. One minor issue was that It was hard to keep the yacht tracking on the ideal heading as it tended to slip away to each side. Care was needed as when you 'looked away' you tended to head off course very quickly. This probably could have been corrected with better sail balance. We did not have the opportunity to sail on a broad reach in a moderate wind.
The Perry 43 was easy to sail and very 'forgiving'. We were probably over cautious and sailed with a No. 1 or No. 2 Reef in the main. We sailed with a full main on the second last day in a 10 knot breeze. Handling the reefing ropes when lowering the sail was messy. A furling main would have been nice, but the operators were not in favour for charter yachts as the furler could jam and prevent lowering the mainsail.


DAY 11 - Upwind passage from Cid Harbour to Lindeman Island
The winds had dropped to 15 knots South. We decide to make a long passage south to Lindeman Island and stay overnight at Plantation Point, on the southern side of Lindeman Island, or at Burning Point off Shaw Island.
The long beat south was very enjoyable even though it took 5 hours. The cat sailed very well and was not tiresome despite the long passage. The cat handled the 1m swell very well.
We decided to anchor at Plantation Point, despite it being exposed to the south. The winds had dropped and there was only a small chop. We were careful to ensure we had good swing clearance in the event of a wind change. We went ashore on the lovely beach for a little 'ghost busting'. The Club Med Lindeman Island resort is closed for the time being, and is being redeveloped by the new buyer. Very pleasant overnight stay. Nice reefs.
On the Way - 5 hour beat upwind


Plantation Point


DAY 12 - Passage North from Lindeman Island to Border Island and Dumbell Island - Whales!
After a nice stay at Plantation Point we hoisted the sails, with the mainsail right to the top of the mast. The winds had dropped to 10 knots, but the 1 m swell remained from the previous day.
Just after leaving the mooring on Lindeman Island we saw our first whales. We stopped for photos while keeping well away. We also saw another group of whales shortly after. They appeared to be killer whales, with white patches on their belly, but hard to be sure. There were four other whale sightings during the following days.
The winds were too light to prevent the main bagging about over the 1 m swell on a very broad reach. We persevered for 3 hours and then lowered the sails and motored to Border Island. The buoys at Cateran Bay, Border Island are as scarce as hens teeth. We noticed that both buoys on nearby Dumbell Island were free, and so we grabbed one, and stayed there overnight. What a delightful place!!
The diving here was fabulous. There were even warm solar-heated patches in the calm glassy waters near the island. We also went ashore in the dinghy. There were a lot of jelly fish in the water of all sorts, shapes and sizes. Unfortunately Harry reacted to one of them, and this kept us out of the water. Still, it was a delightful place and so nice to have it to ourselves.
Off on Passage North from Lindeman Island to Border Island - Whales!


Lovin' It at Dumbell Island


DAY 13 - The Last Day - Time for the Last Dives at Maureen Cove
We decided to head north again on the last full day to enjoy our last dives along the northern coast of Hook Island. We spotted a vacant buoy at Maureen Cove and grabbed it for the afternoon and night. We had intended to head back to Border Island, but Maureen Cove was too enticing.
We had our best ever dives here. We saw manta rays, sharks, turtles, a huge variety of fish. Whales frolicked offshore, almost on cue for our last day. Dive boats made regular visits with all sorts of odd equipment including airline style slides for quick exits from the twin-mast wooden vessel (see image). The divers with 'noodles' looked very funny bobbing about in packs with scuba divers underneath blowing bubbles.
A party boat arrived just before dusk with the Hi-Fi blaring out very loudly. Weird way to enjoy the natural environment!!! We shut the cabin doors and tried to avoid taking revenge. The world is full of all types of people, I guess. It was annoying but we tolerated it.
This was just a perfect day for our last day and night on board 'Cat Nap' in the Whitsundays.
Leaving Dumbell Island for Maureen Bay


DAY 14 - Return to Shute Harbour
We headed back to Shute Harbour after a final dive at Maureen Cove. We arrived back at 1100 hours, debriefed, disposed of garbage and offloaded our luggage. There was time for a nice lunch in Airlie Beach before the shuttle bus delivered us to the airport at Prosperine.
Conclusion
A fabulous family holiday (with two 20 year old sons) that far exceeded our expectations. We planned the dates a year in advance and we were able to hold everyone to the commitment, despite other pressures.
Would we do it again? Certainly, as there is so much more to see.
The Whitsundays is a magical and lovely place, with the diving on pristine coral reefs, and exploring secluded island beaches and bushland, the real bonuses. The Whitsundays is a fabulous place to sail.
But we may look for a bareboat yacht holiday in the Italian Riviera or the Greek Islands in the meantime.
Cheers!


© 2015 Dr. John Anderson


")